If you are going to change or add some wiring to your vehicle, then it is important that you get the right trailer wiring. This will give you a clear picture of what needs to be done. Basically, a trailer wiring diagram is a plan that helps you determine the placement of wires in a trailer wiring system. The wiring diagram for your vehicle must be properly organized and laid out before you start working on it. This will make the job easier, plus you will be able to see where the wires will go easily.
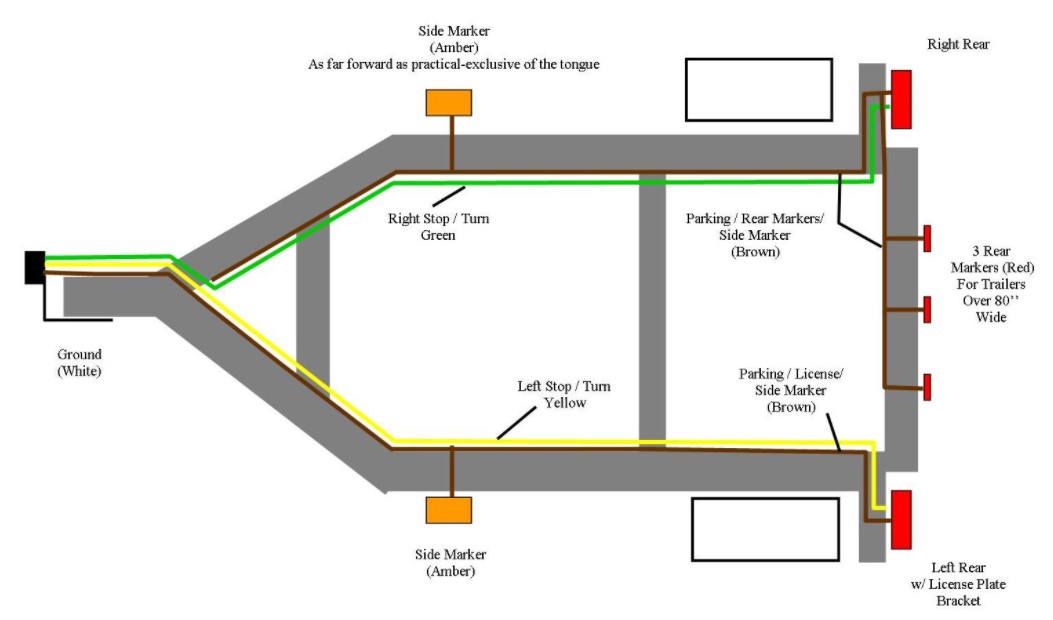
A trailer wiring diagram generally consists of a high-level outline that shows the electric circuit system of the vehicle. These outlines are typically given in the ground in order to protect them and also to make it easy for the customer to understand the electric circuit system of their vehicle. There are many different types of electrical connectors that may be used, but there are mainly four main types that can be found on trailers. The first type is the High Voltage conductor; the next is the Low-Voltage conductor, and the last is the Capacitor/NF Connector.
There are basically four types of connectors that are commonly found on trailers, which are discussed below: The High Voltage Connectors: These are the most common of the four types of connectors because this is how the majority of trailers are currently being powered. There are two high-voltage connectors on one side and two low-voltage connectors on the other side. The high-voltage connectors are usually found on the engine’s front mounts or the starting motor, while the low-voltage connectors are usually located on the engine’s negative crank arm, near the radiator.
The next type of connector found on a trailer is the High-Temperature Insulation Connector (HTI). This connector works by providing protection from the extreme temperatures that occur during storage while allowing power to be obtained to the engines. When selecting an electric power source, it is very important that all power connections are properly insulated. The purpose of the High-Temperature Insulation Connector is to protect all power wires from the effects of extreme heat. This will ensure that all power wires get a clear connection to the engines so that all power is obtainable to operate the engines.
Another common connector on a trailer is the Trailer Lighting Connector (also known as the PLCC). It is a high-quality electrical connector that is used to connect power from the batteries to the various circuits inside of the vehicle. This is an important part of a trailer wiring diagram because if you have any plans on adding more lights to your car or truck, you will need to make sure that the power connection to the car or truck is not affected by the addition of the lights. For most cars and trucks, the wiring for the lighting system should already be done, because this is an item that is often removed from the vehicle along with the vehicle registration in most states. However, in the case of trailers, you will need to check with your local authorities or county offices to make sure that the wiring for the lighting system is included in the final paperwork when you move into your new home.
If you are interested in installing taillights or any other lights onto your car or truck, you will also need to verify that your Trailer Wiring Diagram includes a reference to the hookup wire. In some instances, it may be illegal to install taillights without having a wiring diagram to guide you. This will ensure that you are not crossing the lines by illegally hooking up your lights or other items to your vehicle. It is also important to make sure that your local towing agencies will accept your new wiring if they encounter a problem. Not only can it be illegal but it is also very dangerous to hook up anything to your car or truck without a towing service to verify that it will work. If you have any doubts as to whether or not your local towing agency will accept your wiring diagram, you should ask them before you make any trips with your wiring system.